
Do you use a lot of stickers? If you’d like to save some money and time, this post will teach you how to make printable stickers for your bullet journal without any extravagant tools or software.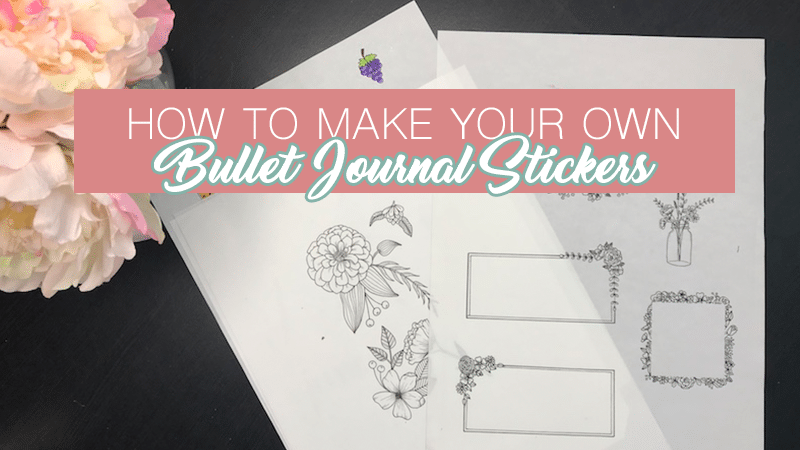 *This post may contain affiliate links. Please see my Disclosure for more information.
Stickers are a quick and fun way to add some creativity to your journal. They’re also great time savers for things like habit trackers, headers, etc. But, stickers can become expensive if you are using them frequently. And sometimes, you just can’t find exactly what you are looking for.
Creating your own stickers is pretty easy, and you don’t have to own any super fancy equipment or software to get started.
I have been creating printable stickers for almost two years now. In the beginning, I was hand drawing every single sticker with pen and paper.
Since then I have graduated to an iPad Pro 12.9″

But, I draw multiple sticker sheets and printable layouts every week for the VIP Resource Library and my shop. So, if you are just looking to create stickers for personal use or to share with a friend, an iPad won’t be necessary.
In fact, this post is going to teach you how to create printable stickers for your bullet journal with just a pen, paper, a scanner, a computer, and a printer. And if you aren’t quite comfortable with drawing your own stickers yet, I’ll show you an alternative using a free online program.
How to Make Printable Stickers for Your Bullet Journal
What You’ll Need
As mentioned above, you don’t need anything too fancy or out of the norm for this. If you are looking to start an Etsy sticker shop, you may want to consider investing in some extra equipment, but for the purpose of this post, you will only need the following items.
- Pencil
- Eraser
- White paper*
- Scanner
- Printer
- Computer
- Sticker Paper
**
*For the paper, I highly recommend getting some quality marker paper, like this paper from Canson

**Sticker paper is not necessary. You can print your stickers on regular paper and then cut them out and glue them in. However, using sticker paper will produce a much more functional end product. This is my favorite brand

If you aren’t comfortable drawing your own stickers yet, I will be sharing an alternative method using a free online program.
Drawing Your Stickers
The first thing you will want to decide is what kind of stickers you want to create. Do you want to make weekly headers, banners, decorative stickers, habit tracker’s etc?
You may consider some of the following:
- Monthly Headers
- Daily Headers
- Water Trackers
- Flags and Banners
- Small corner decorations
If you are drawing banners or headers, be sure to measure the correct size your stickers should be. Then, use pencil to draw lines of that length where you will be drawing your stickers.
Always start with your pencil first. This will prevent messing up and then having to use a program like Photoshop to remove mistakes.
If you are drawing habit trackers or stickers that require you to measure out each small box, marker paper
I Don’t Know How To Draw but I Want to Learn

These stickers are from my Free Boho Stickers Printable.
If this sounds like you, I want to give you some ideas to get started with your practice and confidence. First off, know that you don’t have to be an artist to draw and doodle.
You can start by simply printing out pictures you like and tracing over them to get a feel for drawing. But, I believe, with the right resources, anyone can draw right out of the gate.
I have created lots of doodle tutorial posts that walk you through each step of the process. Even if these aren’t the doodles you want to be drawing, they can help you get the basic idea, which is to break things down into simple shapes.
Here are some posts for you to check out:
- 11 Simple Planner Doodle Tutorials for Beginners
- 10 Step-by-Step Summer Doodles for Your Bullet Journal
- Free Printable Bullet Journal Doodles Practice Sheet
- Learn to Doodle in an Hour or Less
One of the greatest keys to your success is going to be consistency. If you want to get better, make time to practice every day. The best way to do this is to join a doodle challenge.
There are quite a few hosted on Instagram every month, including my own, Oodles of Doodles. You can find the prompt list on my Instagram Feed. I usually post it around the 22nd of each month.
You are only in competition with yourself when participating in these challenges. So, don’t get discouraged. Just keep trying to be a little better than you were last week or yesterday.
Scanning Your Stickers
Everyone has a different scanner and computer, so this process may be a bit different for everyone. But, you will want to find your printer/scanner software on your computer. Then click the scan button.
Make sure your paper is in the scanner straight and with the drawing side facing down onto the scanner. Then, on the scan screen on your computer, change the Kind to Text if your stickers are only black and white. This gives you the cleanest and crispest lines. For colored in stickers, choose Color.
Then, set your DPI to 300. Make sure you have selected US Letter for the size and chosen the correct orientation of your page. It’s likely in a vertical orientation.
After this, change the file type to PDF and set the file name to whatever you want. You can also choose where to save your file. When all of this looks right, go ahead and click Scan.
Printing Your Stickers

Now that you have scanned in your document (or saved with Canva), you are ready to print your stickers. If you are using sticker paper, make sure to load it into your printer. Again, everyone has different printers so this process may be slightly different for you.
For most printers you will want to load your sticker paper
First, you will want to open your sticker sheet in a PDF Reader like Adobe Reader (100% Free if you don’t have it yet.) Then, go to File and click print. Be sure your print settings are set to color and actual size.
Then, simply print out your stickers. If you are using sticker paper, all you have to do is cut out your stickers with a pair of scissors, remove the backing and stick them in your bullet journal.
If you are using regular paper, you will need to cut out your stickers and then adhere them to your journal with either glue or adhesive tape
The Alternative to Drawing Your Own Stickers
If you don’t feel comfortable drawing but still want to make your own stickers for your bullet journal, there is an alternative way.
Canva is a free to use, simple graphic design program. It’s hosted online so you don’t have to install any software on your computer.
Getting Started With Canva
The first thing you will need to do is create an account. You can do this with your email or by logging in with a social platform like Facebook.
Once you have an account setup, you will be directed to your dashboard area. This is where you can pick new design templates and see previous creations.
You will want to click the green “Create a Design” button in the lefthand column. From there, find Letterhead (US) under the documents section and click it. This will open up your 8.5″x11″ canvas.
Creating Your Stickers
Once your canvas is open you can start designing your stickers. I’ll walk you through how to make the sticker sheet you see below. Psst, you can download it for free at the bottom of this post.
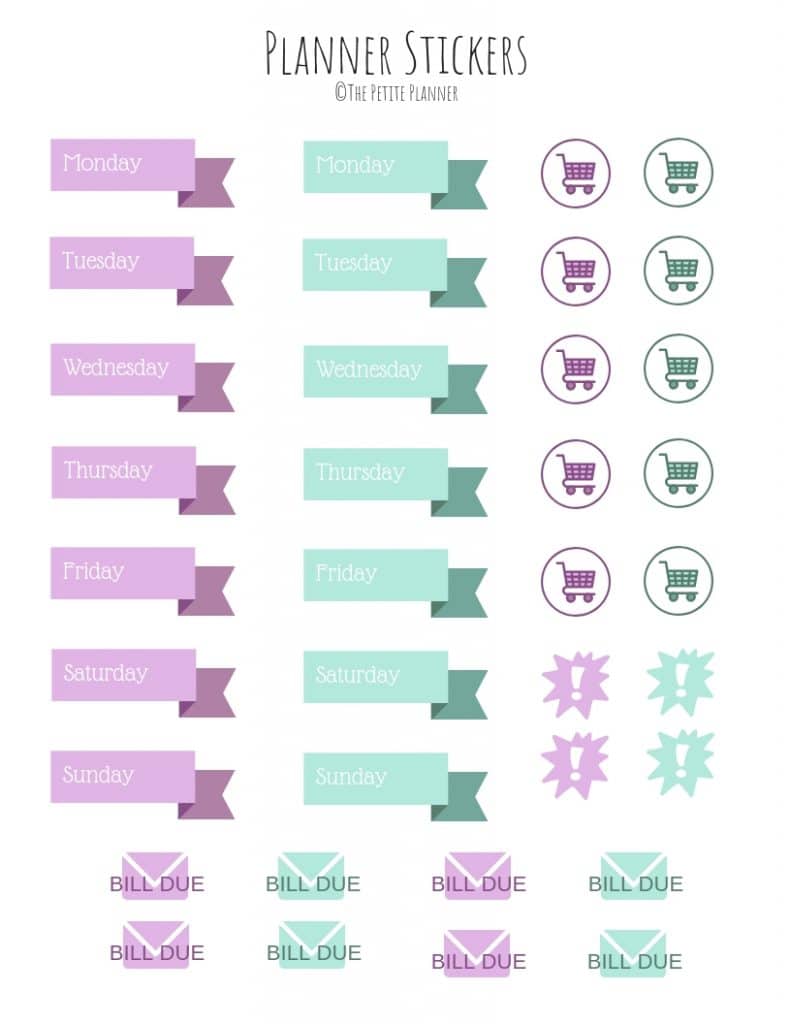
First, go to the search icon in the menu on the left and type in banner. I chose the pink one with a single tail coming off the right side. From here, shrink it down. You will have to estimate sizes a little.
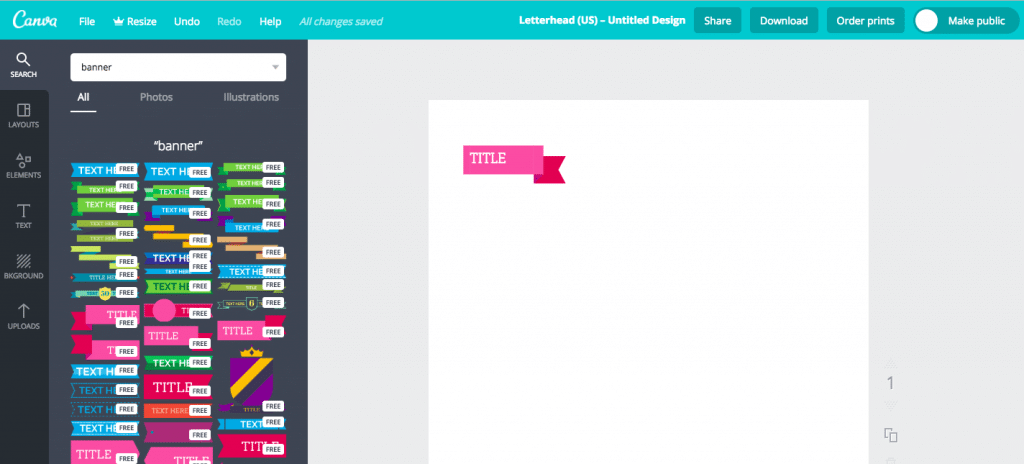
Then, you can change the color by first clicking on the banner and then going to the top menu where you will see three colored boxes. You can change each color individually. I went with a purple gradient.
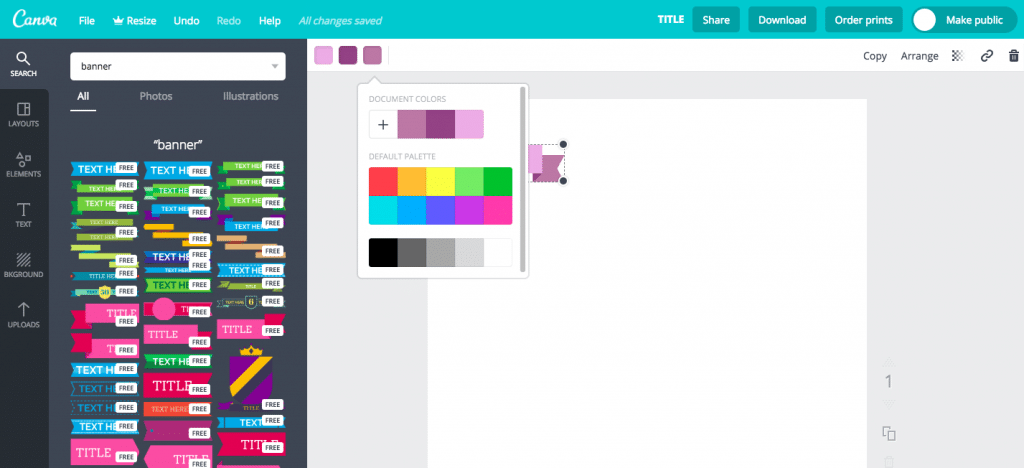
Then, to change the text, double-click on the text part of the banner. From here, you can use the options in the top menu to change the font, size, and color of your text. I chose Glass Antiqua for the font and left it white.

Type in your header. I made weekday headers, so I started with Monday.
Now, you can simply duplicate your header and change to text. To do this, be sure your banner is selected with the little dots all the way around it. Then, in the top menu at the right, click copy. Erase the text in the copy and type in your next header. Continue with this process until you have all of the headers you want.

From here, you can copy the entire group of headers over to create another set. Hold down the shift key and click on all of the headers you made. This will select all of them at the same time. Then, hit the copy button.
Now you will have two copies of all of your stickers and you can go through and change the colors on the second set if you’d like.

Making Icon Stickers
Continuing on with the same sticker sheet we were working on above, let’s make some icon stickers with free elements you can find in Canva.
Go back to the search bar and type in the word cart. We are going to make some Grocery Shopping Stickers.
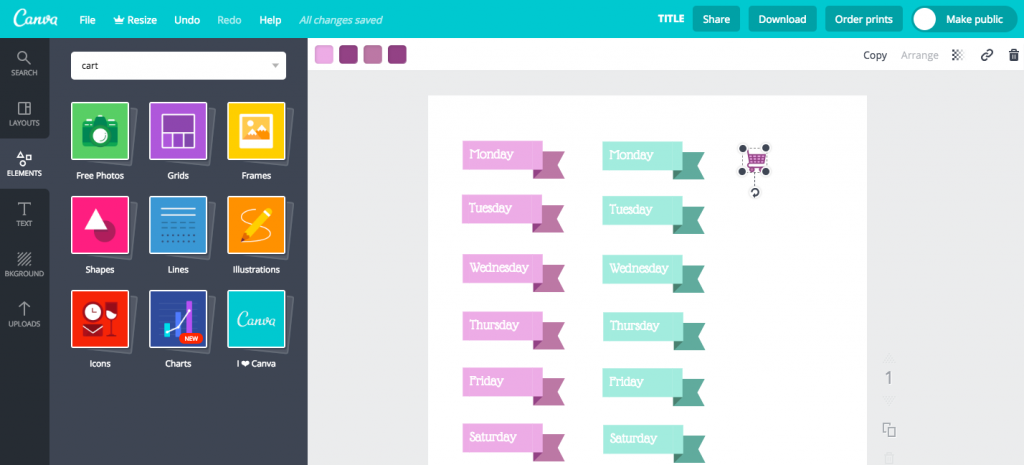
Pick one of the cart icons you like. Just like with the banner, you can change the color.
Now, go to the Elements tab on the lefthand menu and click on shapes. Scroll down a little until you find the circle outline. Click on it to insert it into your document.

Then, use your mouse and to shrink it to fit around your shopping cart icon. Again, you can change the color if you’d like.
Now, starting from above the icon you have made, click and drag your mouse over both the shopping cart and the circle to select both at the same time. Go to the top menu and click Group. This will combine the two elements.

Now you can make copies of your shopping icon.
Continue to fill out your sticker sheet with stickers that are beneficial to you. Canva offers a ton of free images and elements you can use to come up with unique designs.
Savings Your Design
When you are finished with your sticker sheet, you can download it to your computer. To do this, go to the top menu. Next to the share button is some text. Change it whatever you want your file name to be.
Then, click the download button. It will give you a drop-down menu of file types you can save your document as. I have had the best luck saving my documents as PDF-Print.
Once you save the file it should go to your downloads folder on your computer. From here you can follow along with the tutorial above to print your stickers.
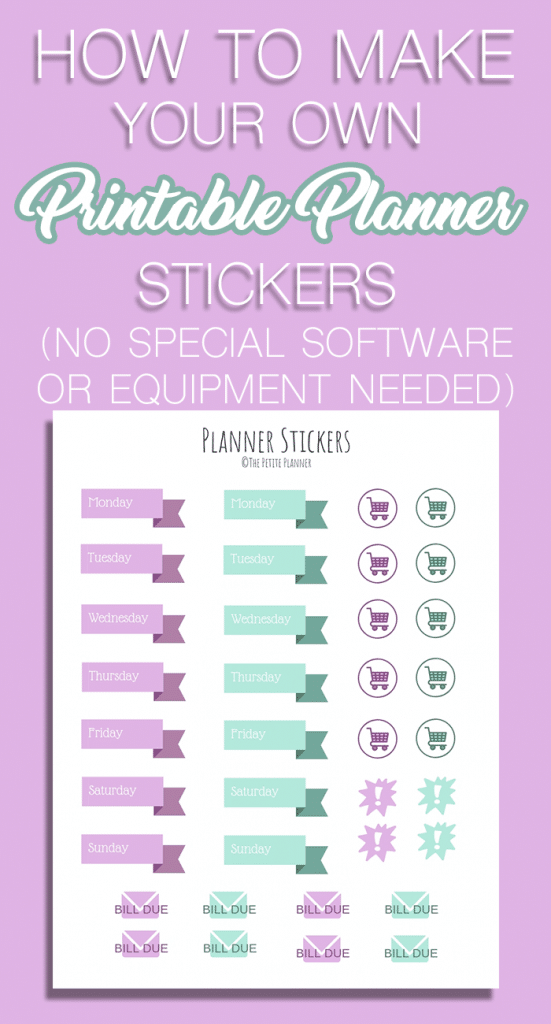
Download The Planner Sticker Page Shown Above Here

