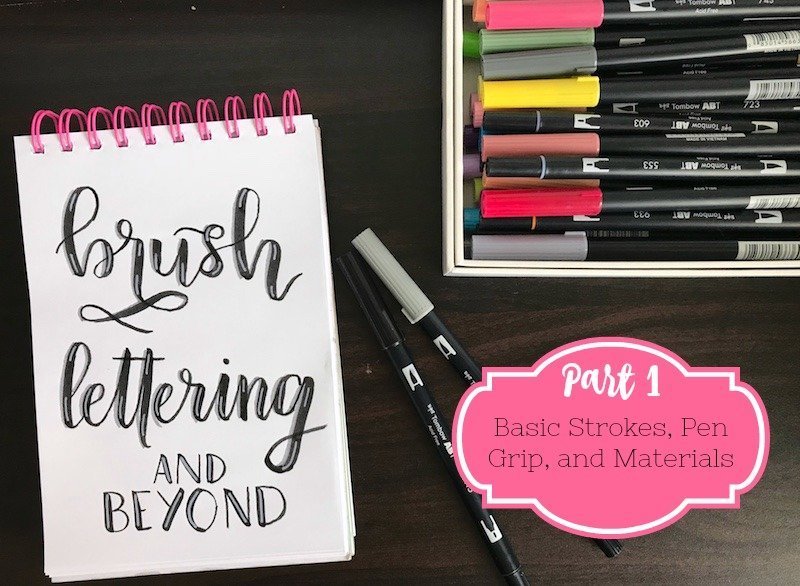
Welcome to the Brush Lettering and Beyond Blog Series. This is Part 1. This post will teach you basic brush strokes, grip techniques, and the best materials to use. This is a 5-part series. You can find the rest of the series at the bottom of this post.
*This post may contain affiliate links. Please see my Disclosure for more information.
If you have been a reader of this blog for long, you may remember my last blog series, Bullet Journal 2.0. It’s a 10-part blog series filled with just about every bit of bullet journaling info you need to start and keep up on a bullet journal. It was very successful and continues to see a lot of traffic. On top of that, I received quite a bit of positive feedback from that series, and it made me want to do another one. So, after many requests and questions about brush lettering in my email and on Instagram, I designed this series.
The Brush Lettering and Beyond series will walk you through every step of learning brush lettering. From the very basic brush strokes and materials to the more advanced embellishments and bounce. I’ll also be including tons and tons of resources. Because, while I do think fairly highly of myself and my skills, there are so many other talented brush lettering artists with lots of information to share. And you deserve access to all of that information.
So, we will jump right into this with the basics of brush lettering, including materials, grip technique, and basic brush strokes.
Brush Lettering Materials
We’ll start with materials so you can figure out what you are going to use, or if you need to buy some pens.
Brush Pens
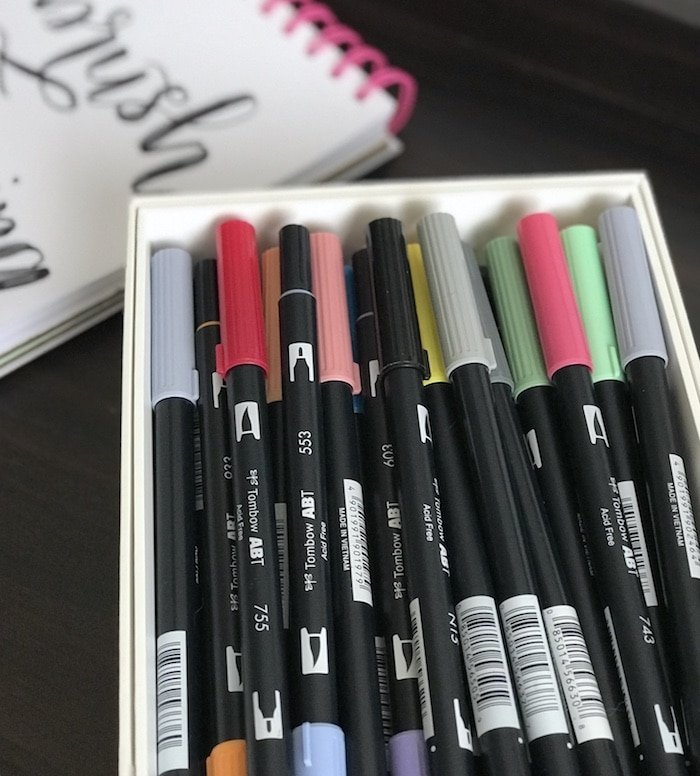
The obvious choice among the brush lettering community is Tombow brush pens. There are over 90 colors, the brush tips are flexible and durable, they are self-cleaning, and they’re dual sided. The downside is that the price reflects the quality. AKA, they’re pretty pricey. Some places charge up to $5 per pen! Yikes! However, you can get a number of their 10-packs on Amazon for under $20. And, they are definitely worth every penny. If you’re serious about brush lettering, Tombows are an investment and not just a careless purchase.
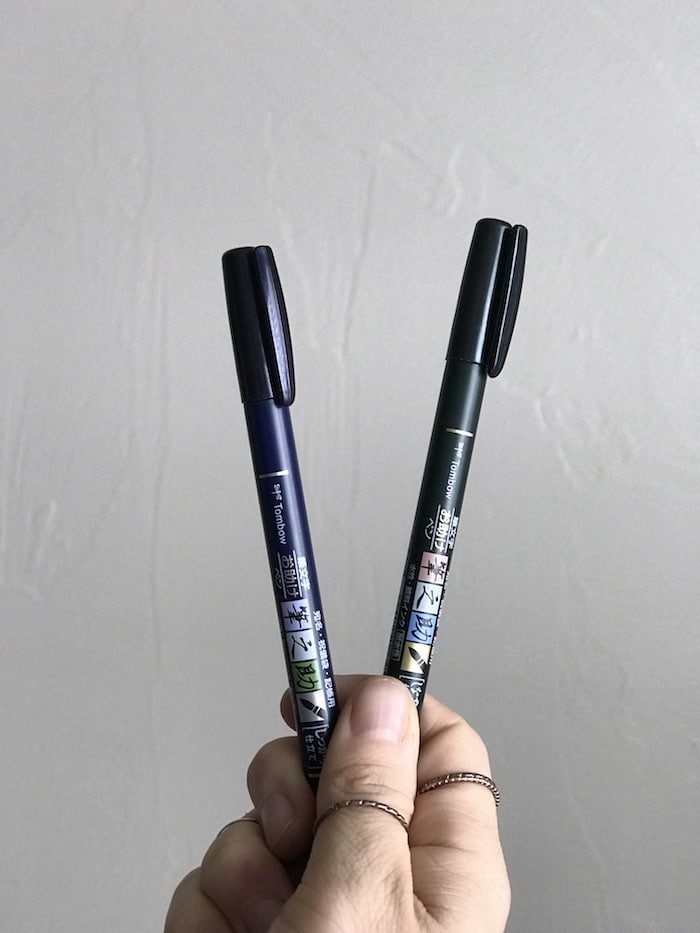
If you aren’t looking to invest that much money, there are more affordable options. I love the Tombow Fude pens. They have a brush tip in Hard or Soft and go for about $2-$3 a piece on Amazon. I just used these pens to address my Save the Dates, and I’m going to gloat a little here, they turned out lovely. I recommend the Hard Tip Fude pen if you are a beginner. It offers a little more forgiveness with pressure. It also makes you really think about your up and down strokes.
And, even if you aren’t looking to spend any money on new pens, you can learn and do brush lettering. Do you have some Crayola markers laying around? I like to use the SuperTips

Blending Pens
The one thing I do recommend that you buy is the Tombow blending kit. It’s so fun to use and you can create the most gorgeous ombre effects with this kit. You get the colorless blender, which is self-cleaning, the blending palette, and a mister. The mister can be used to make watercolor backgrounds and to blend two different colors together to make a new color.
Penmanship Paper
I highly recommend you download some penmanship paper when you first start out. It helps to make your letters an even height and to keep them in a straight line. I noticed when I first started brush lettering, my letters always got smaller, and my writing always started to curve up or down. You can download penmanship paper for free, here.
Materials Overview
So, if you skilled through all of that, here’s what you need:
- Brush pens like Tombows
OR Crayola Markers
- Blending Kit
- Penmanship Paper


You’ll also want a pencil. Any pencil will do, but you will want one to start. Hell, I still use a pencil to write out my words before going over it with a brush pen.
The Importance of Your Grip
The main thing to remember when starting brush lettering is how you hold your brush pen. You have to keep the pen at an angle while writing. This allows the tip to flex when pushing down on it and then unflex when releasing pressure.
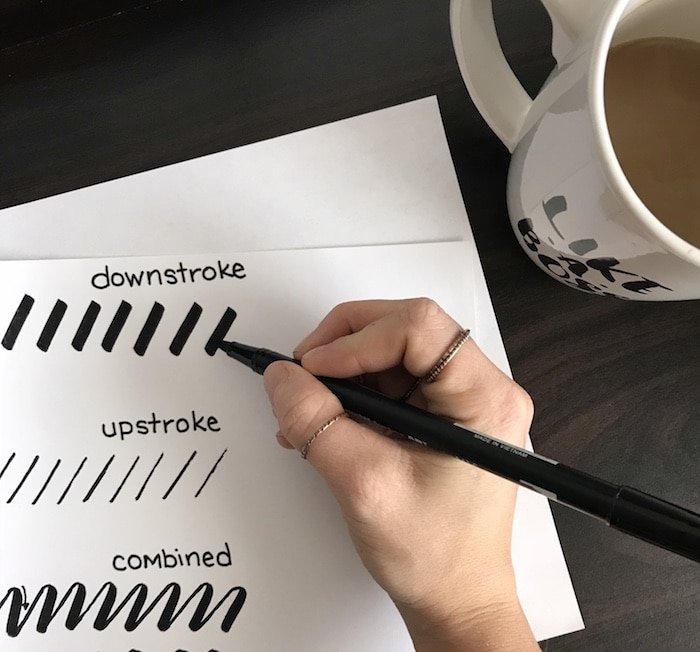
If you look at my picture, you will notice that I hold the brush pen near the tip with a light grip. The pen in angled and resting against my hand. You are free to adjust your grip on the pen to make it more comfortable as long as you keep the pen angled. This is going to take practice. Just because you see someone else hold their pen near the tip with a traditional pencil grip does not mean that’s what you have to do. Find what’s comfortable for you. Take time to practice different grips and find your own comfort zone.
So much of brush lettering is finding your own flow. So, it’s hard to give a tutorial on how to hold your pen because everyone does it a little different. But, if you can remember to hold your pen at an angle you’re doing good.
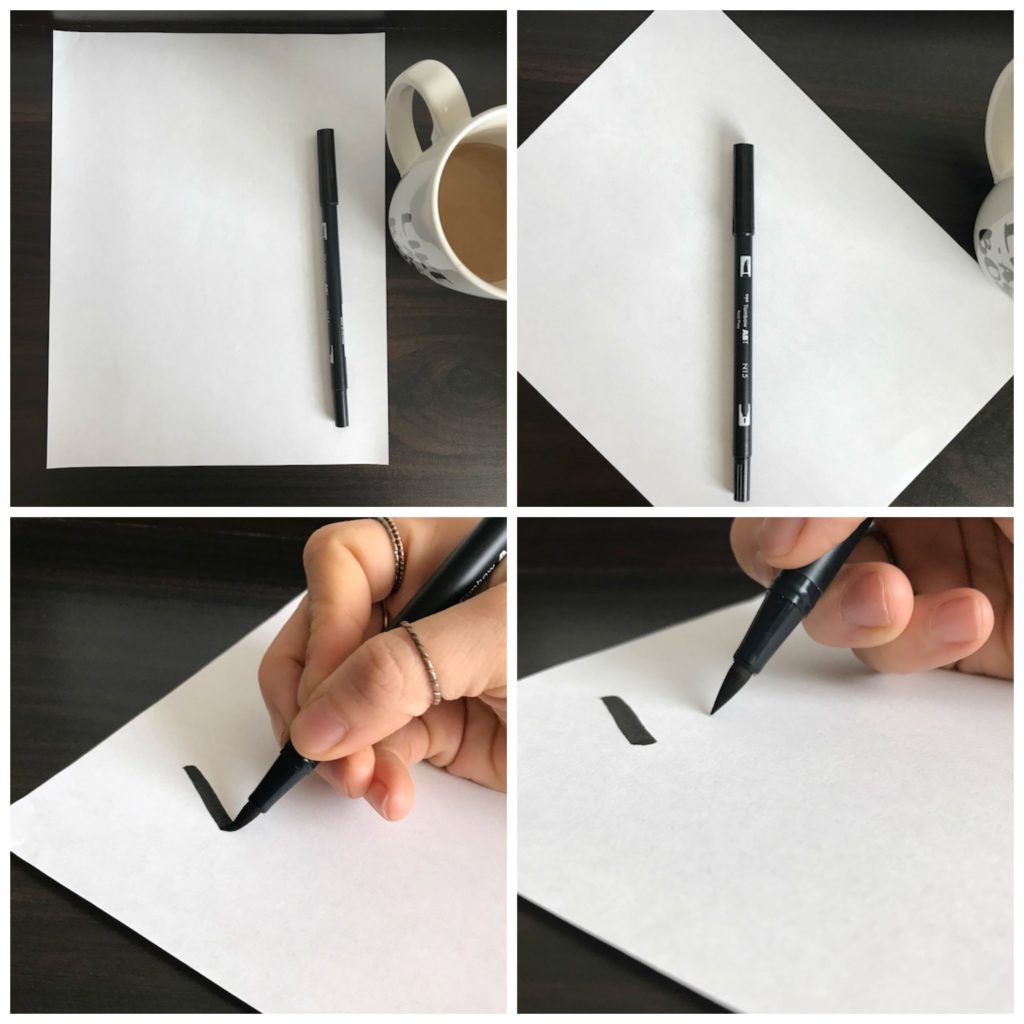
The next step is to change the alignment of your paper. In order to do this, sit at your desk or workspace facing forward, towards your paper. Then, you rotate your paper so you are able to comfortably making angled strokes. For me, I rotate my paper about 45º counter clockwise. This is hard to explain in words, so be sure to check out the collage of photos below to see what I mean.
The Basic Strokes of Brush Lettering
We’re on to the final portion of this post: strokes. The idea is relatively simple. On downstrokes, you apply firm pressure, and on upstrokes, you release all pressure from the pen (see above collage for pressure examples). This gives you thick downstrokes and thin upstrokes. However, the actual process of creating these strokes is a little more difficult. It takes practice.
When I started brush lettering, I jumped right in with trying to write words, and I got so frustrated that my hand was cooperating. I was moving too fast and my hand wasn’t used to the up and downstrokes. It eventually just becomes a habit and you don’t have to think about it. But in the beginning, it’s best to work on some drills.
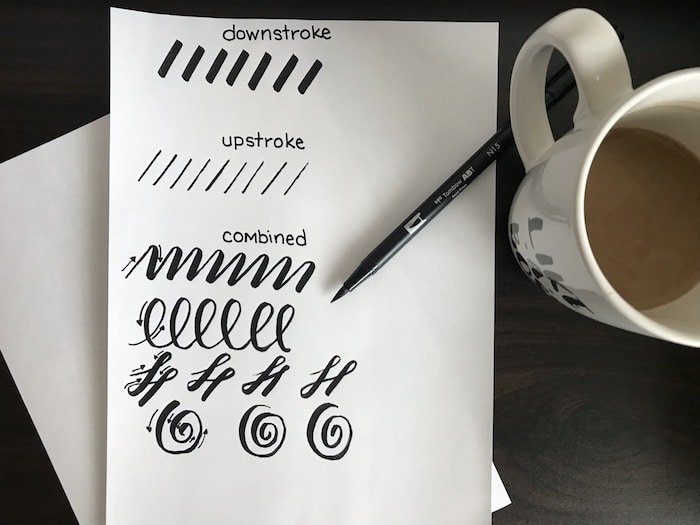
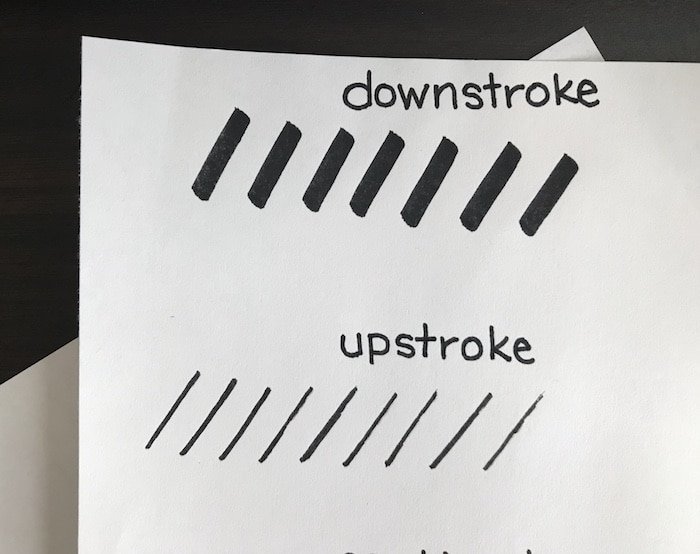
In these drills, you are making different strokes that incorporate both upstrokes and downstrokes. You start off simple with just the downstrokes. Remember to turn your paper so that writing at an angle is comfortable. Then adjust your grip so your brush pen is at an angle. Then, make individual downstrokes by applying firm, consistent pressure. For the individual upstrokes, release all pressure. The tip of your pen should bearly touch the paper.
The next drills combine up and down strokes. Remember, in modern calligraphy, you can lift your pen off the page. You don’t have to make a continuous stroke. In the third drill, you will be making an ‘M’ shape over and over. The fourth drill is a loop or ‘L’ shape. Work on the first four drills until you feel like you have the up and downstrokes down. Get comfortable making those general up, down, and loop strokes. Once you feel comfortable there, you can move on to the last two drills.
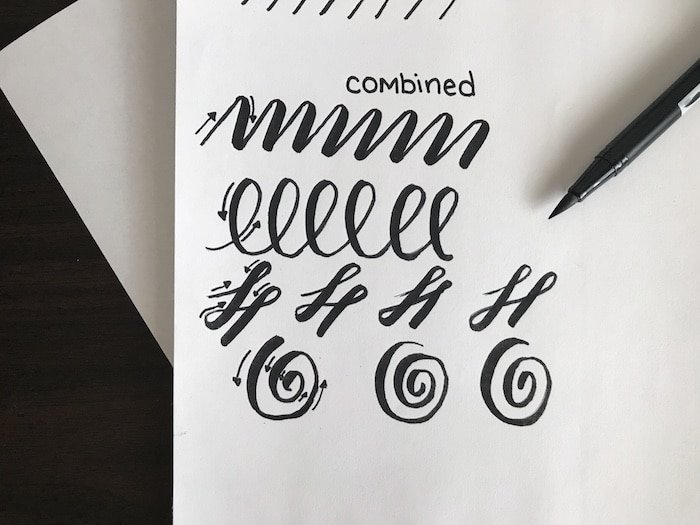
The next drill is tough to explain. It’s going to be similar to writing a two cursive ‘S’s, but at different heights. You start with an upstroke, then loop back for a downstroke, the loop back up for an upstroke, and one more time for another downstroke.
Finally, you move on to the spiral. The spiral is great practice because it makes you really concentrate on your up and downstrokes in one motion. Like I said, you can lift your pen. But there will be times you will have to move from thick to thin strokes in one brush stroke. So this is good practice for those times.
Your Assignment
Oops. Did I forget to mention that there was an assignment attached to this post? Well, there is. And there will be for every post in the series. Obviously, I’m not your professor and I can’t grade you or make you do your homework. But, if you are serious about brush lettering, definitely trust in the practice and do these assignments.
1). Practice holding your pen at an angle. Find a grip that works for you, whether it’s nearer to the tip or further back.
2). Complete the above drills with different grips to find what works best for you. Practice these drills for at least 15-20 minutes a day, and don’t move on to letters until you have mastered these drills. It’s ok to go slow and be a little shakey. You can perfect the minor details later. Just keep practicing.
Other Parts in the Series
Want to keep up with this blog series? Join me on Facebook or Subscribe to my Newsletter to be notified when the next post comes out. Posts will be published every Thursday through November.