
Welcome to the Brush Lettering and Beyond Blog Series. This is Part 2. This post will guide you through practicing brush lettering and setting up a routine for success. This is a 5-part series. You can find the rest of the series at the bottom of this post.

*This post may contain affiliate links. Please see my Disclosure for more information.
In Part 1 of the Brush Lettering and Beyond series, I shared basic pen strokes, grips, and brush lettering materials. In this post, I’ll be showing you how to apply those techniques to your practice and helping you set up a practice routine. Roll your eyes if you think homework is for kiddos and no one else. It’s fine. But, I promise you, if you want to learn brush lettering, you are going to have to commit to practicing. Homework, my friend.
Practicing Your Hand Lettering
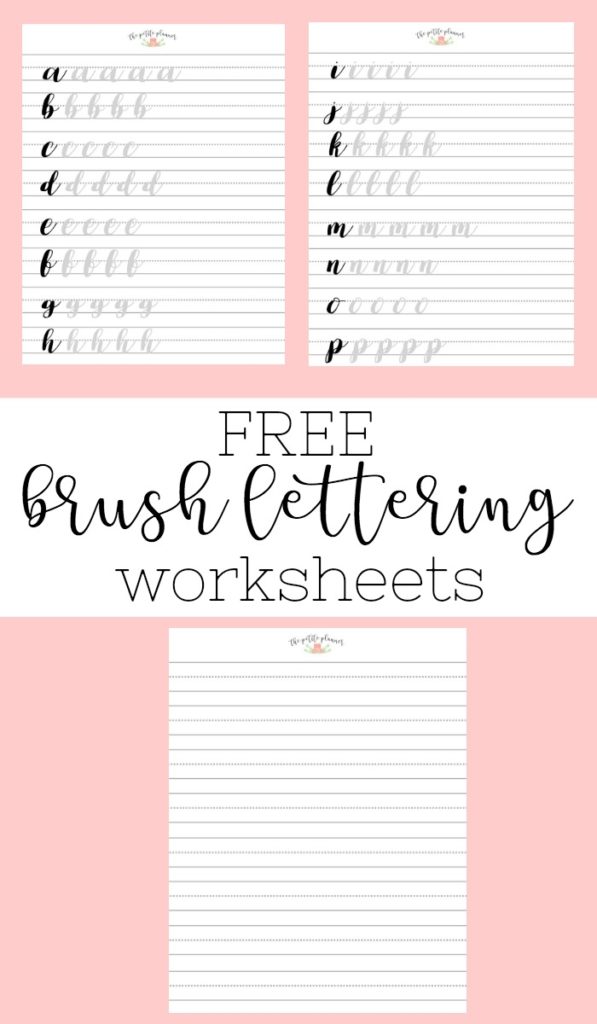
The easiest way to practice hand lettering, in the beginning, is to use practice worksheets. They are often set up with penmanship lines and then faint writing guides you can write over with your own brush pen. What makes these worksheets great is the ability to go slow and feel the curves. You get to practice the same letter over and over, following a guide that will allow you to get in the habit of making those strokes.
Each of the worksheets below has a specific style of lettering. While you’re learning, it’s best to follow the guides. But as you feel more confident in your abilities, you can branch out from the guide and create more of less of an angle in your writing. Add bounce or embellishments (this will be shared in an upcoming post in the series). But, for now, stick with the basics of the worksheets.
With that, there are tons of fabulous brush lettering worksheets online that you can print out and practice on as much as you like. For more in-depth content and instruction, you can purchase one of these best-selling modern calligraphy books on Amazon:
But, for the sake of your wallet, I have created a free printable worksheet you are welcome to download and use. It contains 5 pages with lowercase brush letters and some word practice at the end. You also get a blank piece of penmanship paper for practicing. Get it here.
Remember, the two things you want to think about when practicing brush lettering are 1). the angle of your pen, and 2). the pressure you are using on your upstrokes and downstrokes. If you need a refresher, visit Part 1 of this blog series.
Grab my 9-Page Brush Lettering Practice Worksheet Set from the VIP Resource Library. If you haven’t already, just subscribe to my newsletter and you’ll have instant access to all of my free printables.
More Free Practice Sheets
I often use the same style brush lettering, and therefore, my worksheets may not appeal to you. So, I’ve scoured the web — mainly Pinterest, and found some really great brush lettering worksheets from other bloggers. Check them out and find the style that works best for you.
- 12-Page Brush Lettering Worksheet by Hip Homeschooling Blog
- Lettering Practice Sheets by Tombow USA
- 10-Page Brush Lettering Practice Sheets by Dawn Nicole Designs
- Brush Pen Calligraphy Worksheets by The Postman’s Knock
Creating Your Own Practice Worksheets
Guess what? Creating printable worksheets isn’t just for bloggers and graphic designers. You can do it in a few super simple steps, with your own choice of font and words. How cool is that?
The first thing you want to do is head to Dafont.com. This website has pretty much every font you can imagine. Then, go to the brush menu. This will bring up all the brush style fonts they have. As you can see, they also have calligraphy fonts, handwritten, graffiti, and tons more to choose from. This site is my addiction.

Find a font you like and click download. It will download a .zip file, so you will need to unzip it to reveal the actual font, which will be in a folder. Once you open the folder you may see a few different files. You want the actual font file, which will be the name of the font (usually) and .ttf. Double-click the file to open it. It will bring up a box with a preview of the text. At the bottom of the box, you will see a button that says ‘Install Now’. Click that box.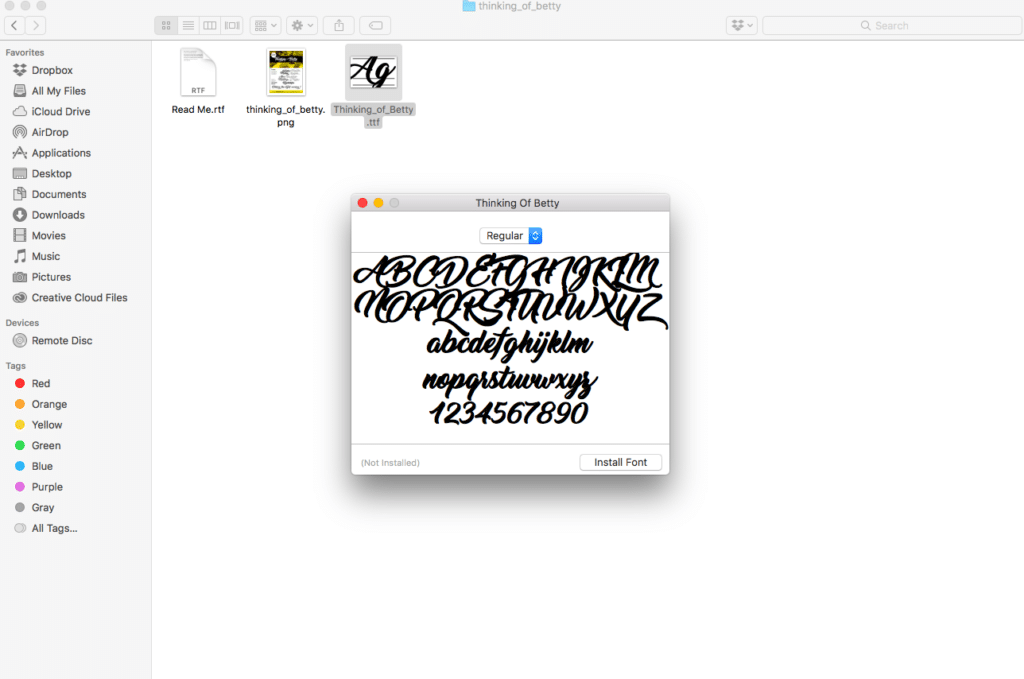
Now, your new font is installed and you can start making your lettering worksheet. Open a Word document or other word processing program. Now, select your new font, make the font bigger (I used 36 pt) and then choose a light grey letter color. Type out the words you want to practice, leaving some extra space between the words.
Is your word document cutting off the tops and bottoms of your letters? Check out this post on how to fix it.
Now, save and print your worksheet, and start practicing.

Setting Up a Practice Routine
Having and creating brush lettering practice worksheets is great. But, if you aren’t using them, it’s not going to do you much good. And chances are, it’s been at least a couple years since you had to do homework (there’s that word again). Well, it’s time get into a practice routine. Your homework is to use these worksheets consistently. You can choose how much time you want to spend practicing each day.
I know that making time for creative practice can be hard if you have a full-time job or are a stay-at-home-mom. I get it completely! Between my two kids, I’m a walking errand machine and often forget to do things for myself. But, with a few simple tools, I’ve managed to set aside some time each day to improve my skills and relax with drawing, hand lettering, or setting up my bullet journal.
I use my Apple Watch 3

How to Make a Routine that Works for You
Decide how much time you can dedicate each day. Choose a time of day that will give you the best shot at uninterrupted time. For me, this is usually late at night after my kids are in bed. Then, either use the Be Focused app, your phone’s timer, or one of these Miracle Cube Timers, and set your time. During this time, do not answer texts, look at Facebook, or check your email. Every time you look at a computer or phone screen, your brain does some funky thing where it pretty much resets and you lose your focus. Disclaimer: I’m not a neurologist, so I may be speaking from my rear-end.

During your time, work on your basic upstrokes and downstrokes. Focus on the angle you hold your pen. And use your worksheets to practice letters and words. Once you have the basics down, start practicing your lettering on unlined and unguided paper. Try different styles. Use different amounts of pressure and angles. Challenge yourself to practice for your chosen time every day for two-weeks. You’ll be incredibly surprised how much you can improve in two weeks.
Staying Accountable
I use my bullet journal to hold myself accountable for my practice time.
Want to learn more about bullet journaling? Read to my Bullet Journal 2.0 blog series.
Add a habit tracker to your bullet journal or planner. You can download one of my A5 habit trackers from my Etsy Shop. Create a ‘Practice Lettering’ item to your habit tracker, and then fill it in each day after you finish your practice. This way, you can see your progress and motivate yourself to practice.
Other Parts in the Series
Want to keep up with this blog series? Join me on Facebook or Subscribe to my Newsletter to be notified when the next post comes out. Posts will be published every Thursday through November.

