
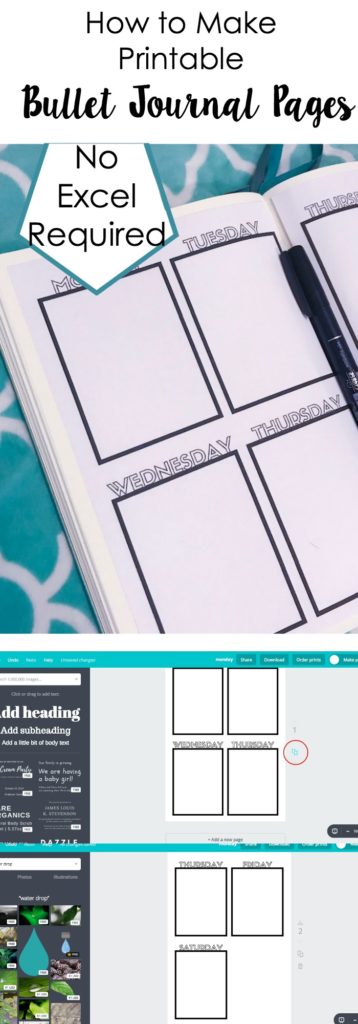
Whether you are feeling like you lack creativity or are just in a hurry and need some spreads on the fly, this tutorial will teach you how to easily make your own printable bullet journal pages.

*This post may contain affiliate links. Please see my Disclosure for more information.
There are tons of free printables on the internet. Just have a quick look at my Pinterest Board dedicated to Free Planning Printables. You’ll find weekly, monthly, goal planning, budget tracking, and every other printable you can imagine. But I also know that not every printable is going to work for everyone. Some will be missing aspects that you desire, while others will have way too much that you’ll never use.
That’s why I’m going to show you a quick and easy way to make your own printable bullet journal pages. There’s no need for a special program, any design skills, and best of all, it’s free.
How to Make Your Own Bullet Journal Printables
Getting Comfortable With Canva
I sometimes forget that not everyone is a blogger and glued to their computer full-time. So, I forget that not everyone knows about the fabulous Canva. Canva is the simplest graphic design program you will ever use.
So here are the steps you’re going to take.
1. Go to Canva.com
2. Make an account with either your Facebook profile, Google Account, or separate email address. Making an account is necessary so that all of your creations will be saved to their database.
3. Go to the left-hand sidebar and click on ‘Create A Design’. This will open up a page with tons of templates. Ignore those.
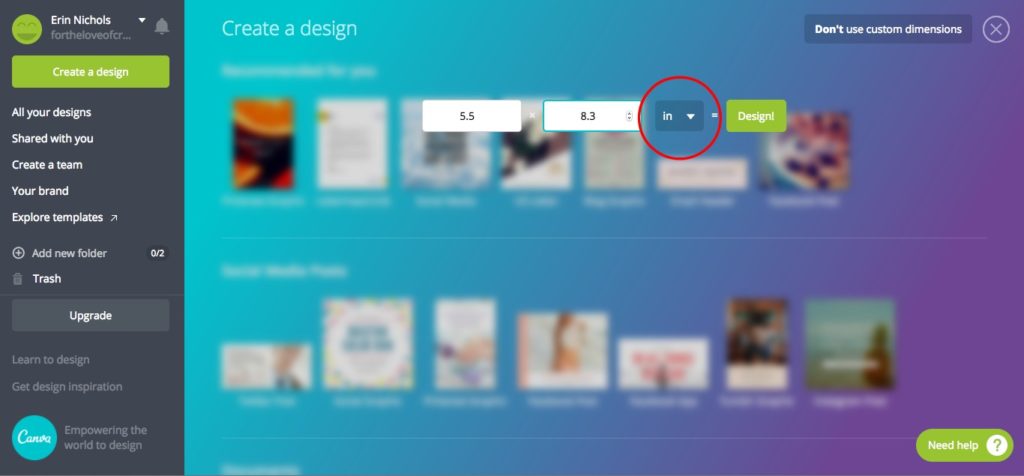
4. Look up in the right-hand corner of the screen. There’s a box that says ‘use custom dimensions’. Click that box. Then, select inches from the drop-down box. It’s default set to pixels, but you want inches so you can make the page fit into whatever notebook you are using.
Measurements for Different Journals
- If you’re using an A5 sized notebook like the Leuchtturm1917
or Scribbles that Matter
you want to set your size to 5.5X8.3 inches.
- The Dingbats
journal is slightly bigger and should be set to 6.3X8.5 inches.
- For a regular letter sized journal
, set your dimensions to 8.5X11 inches.
- For Moleskines you want to set your dimensions to 5X8.25 inches.
If you aren’t sure what size or brand your journal is, just use a ruler to measure the width and the height of the paper.
5. Once you have selected your size, hit the ‘Design’ button. This will bring you to your blank canvas that you can create your printable bullet journal page on.
6. Now, it’s time to get comfortable with some of the tools Canva offers. Along the left-hand side of the screen, you will see a few tabs. We’re going to focus on the two tabs that say ‘Text’ and ‘Elements’.
Coming Up With a Design
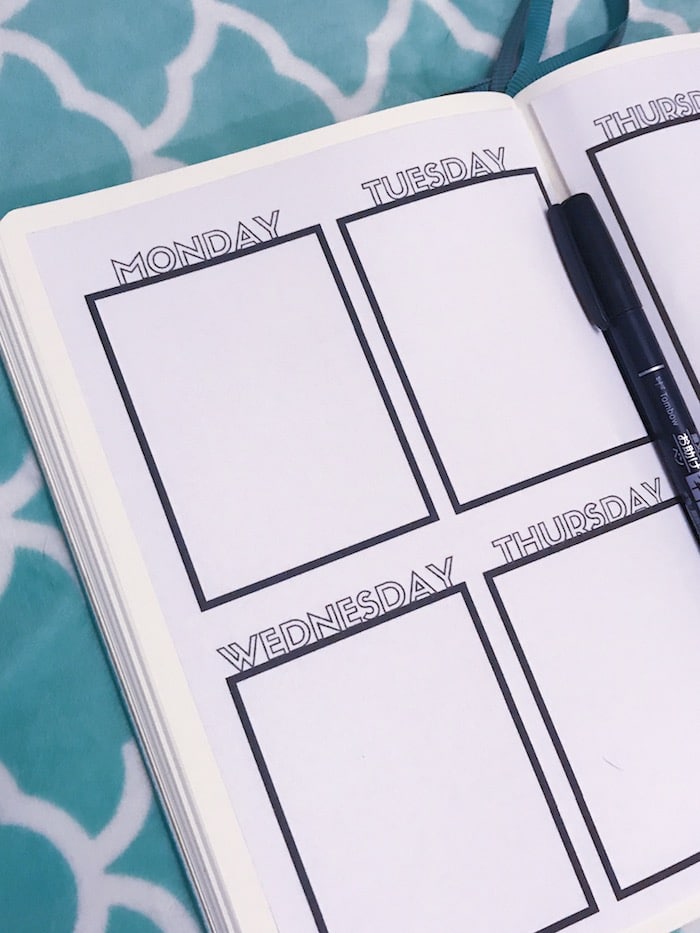
Let’s start with something easy. I’ll walk you through the steps of making the first page of a simple weekly spread and give you the tips and tricks you need to come up with more complex designs.
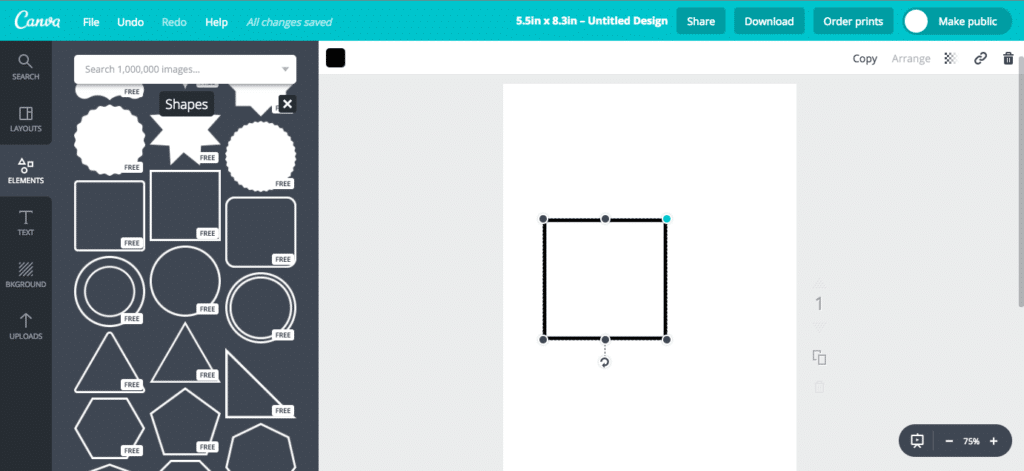
1. First, go to the bottom right and zoom in to at least 75%.
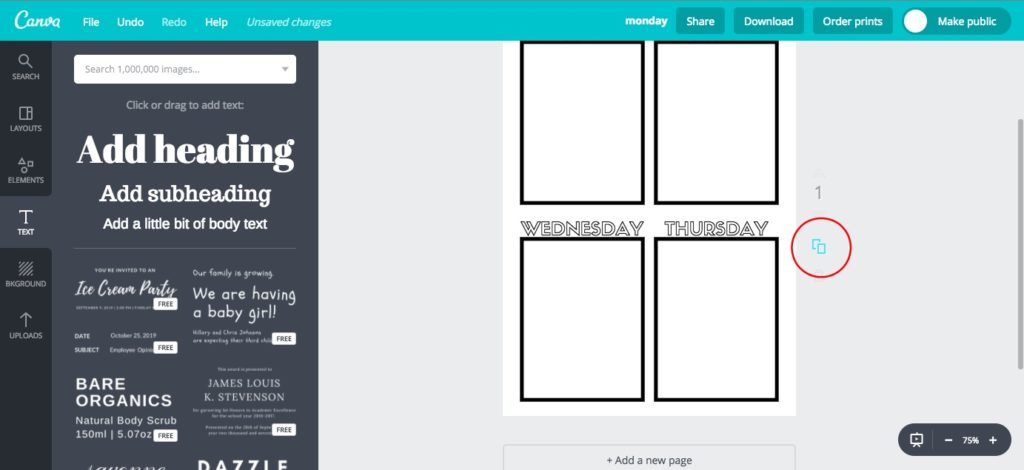
2. Next, click on the elements tab on the left-hand side. Click the shapes button and scroll down until you see the outline of a square. Click it. It will automatically place a square on your page. The square will have clickable circles on it that you can use to drag and resize the square. Drag a corner to make a square that is about a half the width of the page. Then drag the bottom center circle down to create a long rectangle.
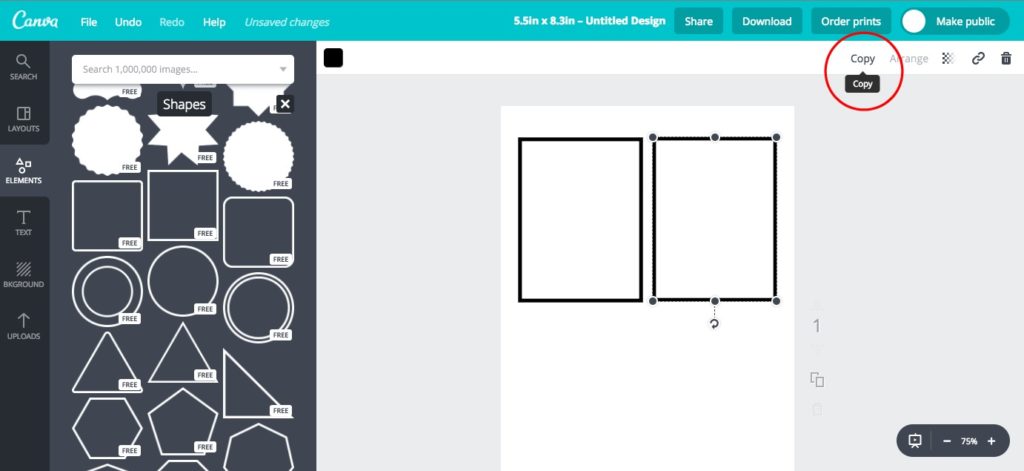
3. To copy the rectangle, be sure you have the rectangle selected and then hit the copy button that is along the top right of the page. Make three copies of the rectangle so that you have a total of four. Now align them in a grid pattern leaving room for a header on each rectangle.
- Tip: Pay attention to the dotted lines that appear. They will let you know when your design is lined up.
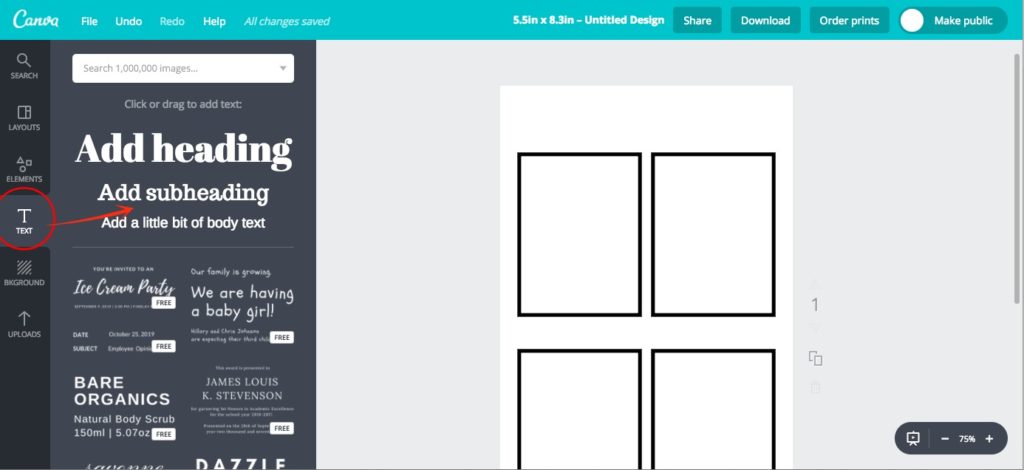
4. Next, go to the Text tab on the left-hand side. Click ‘Add Subheading’. All of your options for your new text are along the top bar. You can select your font, size, color, alignment, and spacing. Find a font you like in the drop-down menu and select it. Type out ‘Monday’. If the text is too small or too big, adjust it to fit over one of the rectangles.
5. Now, repeat the text for Tuesday, Wednesday, and Thursday.
- Tip: You can copy text the same way you copied your rectangle. This ensures your text is the same size and font every time.
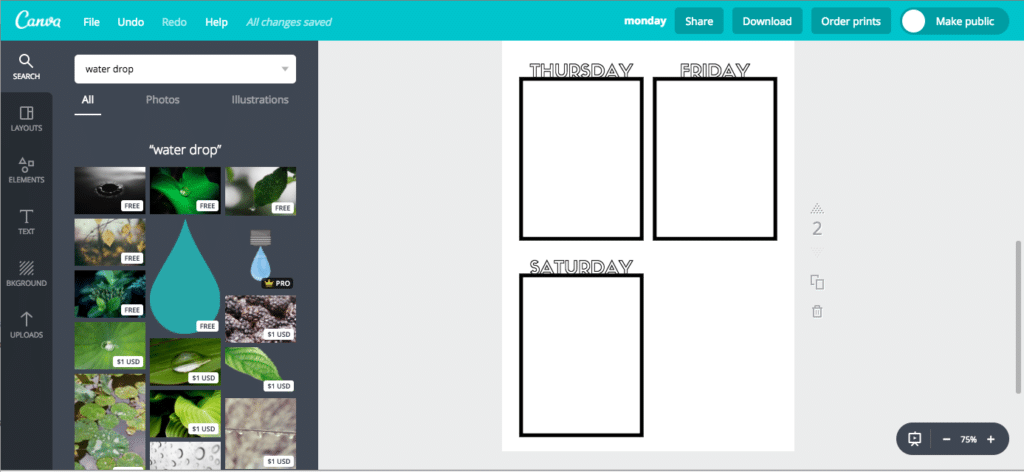
6. Technically, you can be done with your first page. To make the second page, find the two little rectangles next to your designed page. Click it to copy the page. Now, on the second page, remove the fourth box and change the other three days to Friday, Saturday, and Sunday.
Final Steps
The final step is to download your design. Click the download button along the top bar and select ‘PDF-print’. Now print out your page and cut it down to the size you need for your bullet journal. I highly recommend getting a straight edge cutter
That’s it. You can play around with other design elements, add more text, color, or whatever works best for you. But, I do have some final pointers.
- You can search for shapes, illustrations, designs, etc. For instance, if you want to add a water tracker with water drops, search water drops. You will find a free water drop shape near the top of the search.
- You can drag and select multiple elements on your page to copy them or delete them as a group.
- Overlap a serif font with a calligraphy font for a creative header.
- Copy similar elements to create stickers for you bullet journal. I like to use the banners, which can be found under shapes. Then, get some sticker paper
, print them, and cut them out.
- Be sure to look through the illustrations and icons elements. Canva offers a lot of free graphics that work beautifully in planners and bullet journals.
Want access to all of my printables? Subscribe to my Newsletter and you’ll be able to join the VIP Resource Library with exclusive downloadable content.

Teresa A Koontz says
How do you attach your printable to your journal? Do you use a glue stick, liquid glue, tape, etc.?
erinnichols91 says
Hi Teresa. I would likely cut it out and use a glue stick. Liquid glue would make your page a little wrinkled. But you could also use some washi tape if you want to add a colorful border. It’s up to you. Glue is more permanent, where with washi tape you could remove the pages if desired. Hope this helps.