
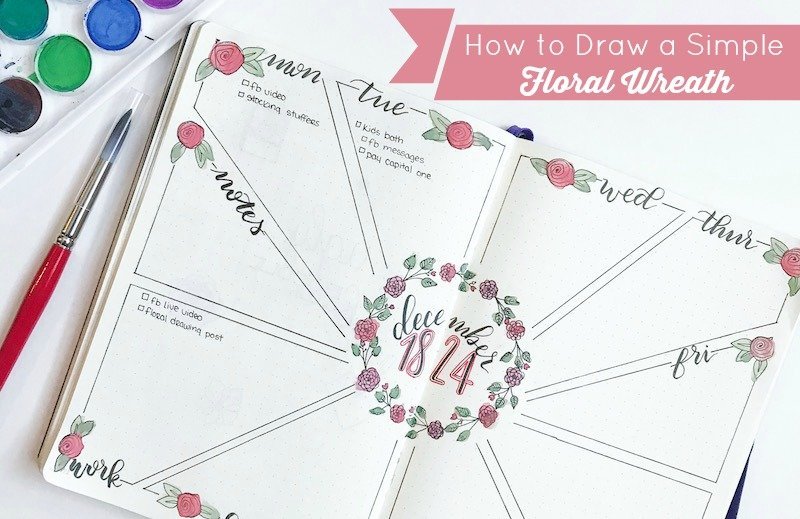
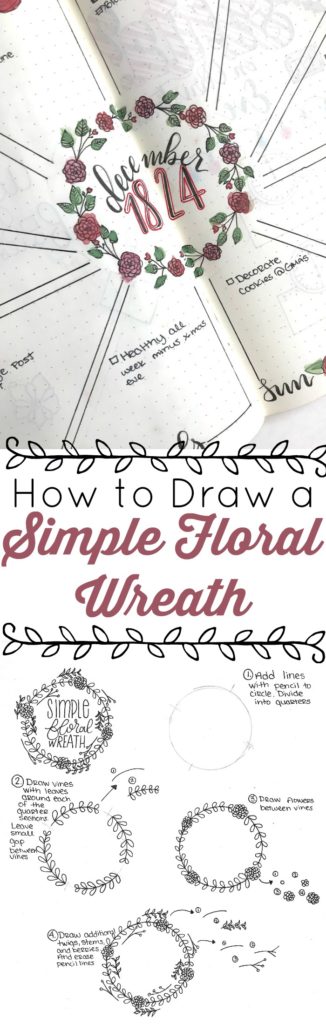
Decorate your cover pages, Christmas cards, and wedding invitations with something that is uniquely yours. This tutorial will teach you how to draw a simple floral wreath that you can recreate with ease.
*This post may contain affiliate links. Please see my Disclosure for more information.
I’ve been on a doodle binge. My Faber Castell Artist Pitt Pen

While the fiance played video games, the one-year-old napped, and my now 5-year-old played with Legos, I drew lots and lots of floral wreaths. And when the baby awoke, I sent my fiance to get her so I could finish my doodling.
I was shown so much love on my last Instagram post with a floral wreath header, that I decided to make this tutorial on how to draw a simple floral wreath.

Once you draw your wreath, take a picture, post it on Instagram, and tag me @the.petite.planner. I’m excited and can’t wait to see what you draw.
How to Draw a Simple Floral Wreath
Materials

 (or something round that you can trace around)
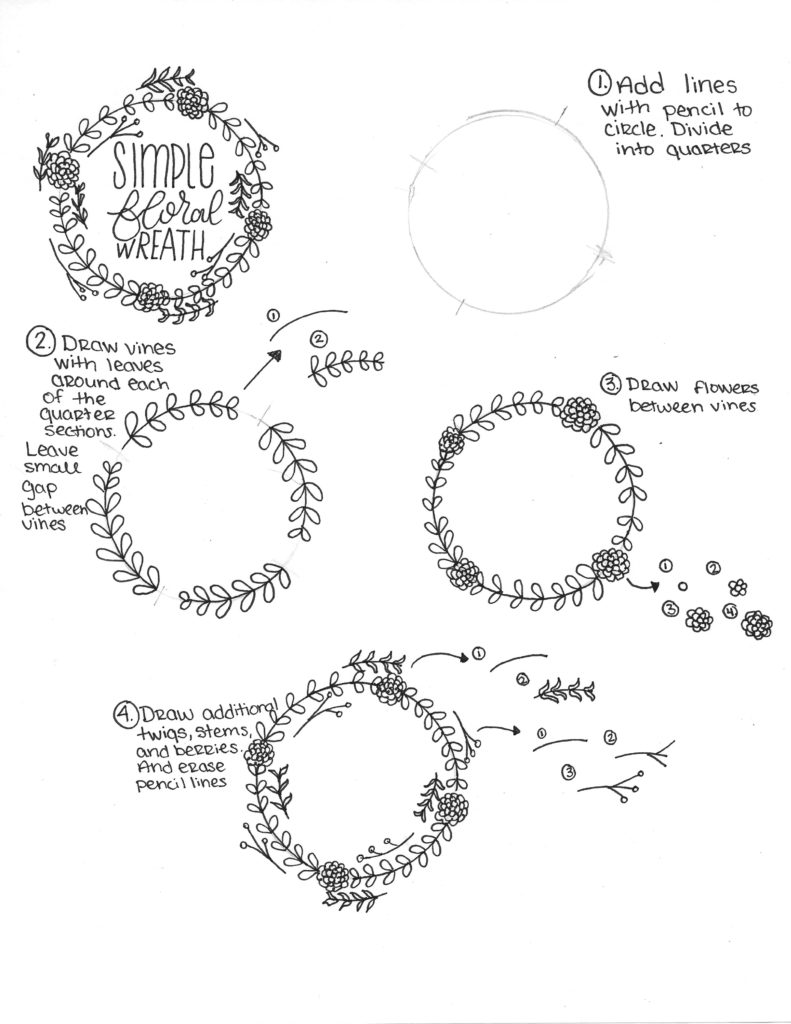
First, grab your compass or round object and lightly create a circle in pencil, roughly 2″ in diameter. This means you compass should span approximately 1″ from the point to the pencil.
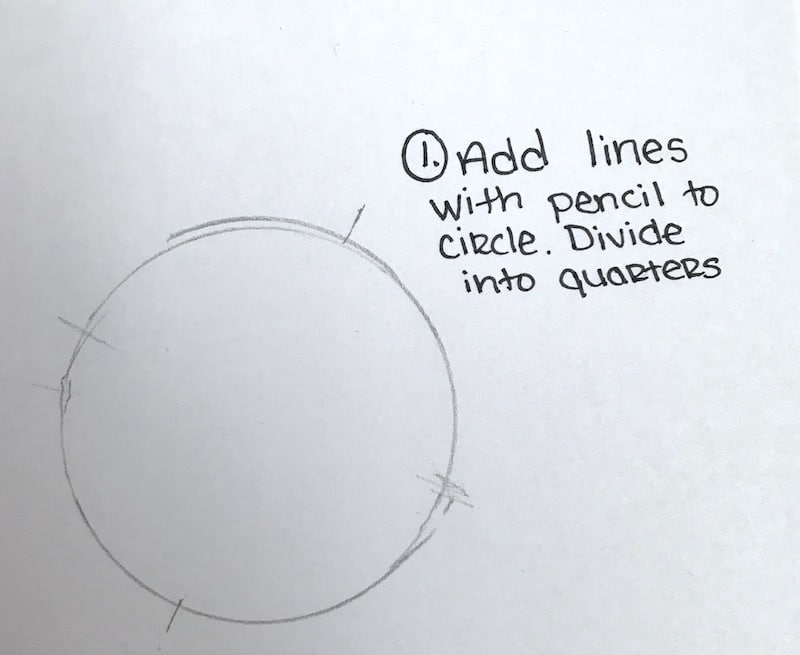
Next, use your pencil to divide your circle into 4 equal parts with has marks. Remember to press very lightly with your pencil so you can erase the marks later on.
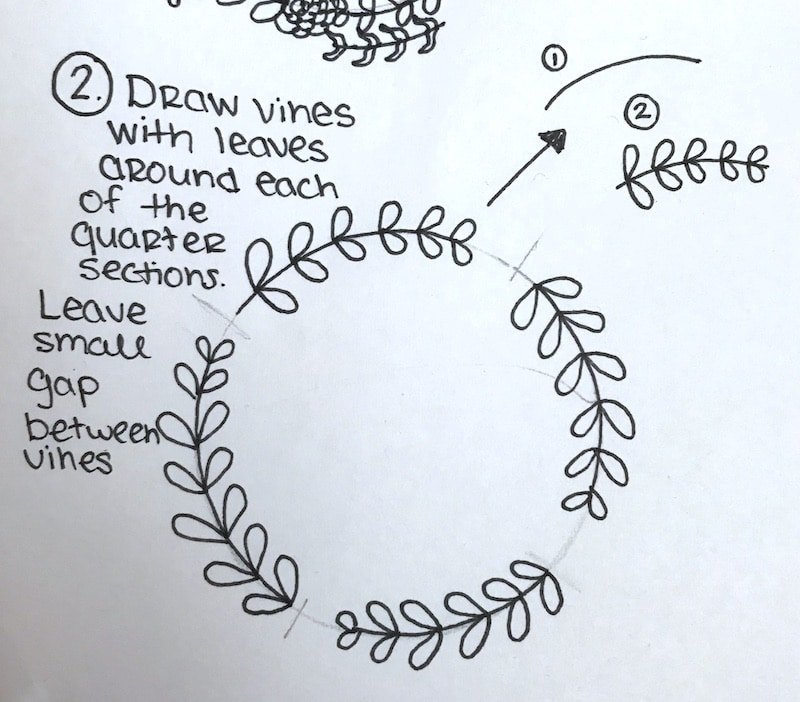
After you have divided your circle, start adding your leafy boughs with your black pen. To create these, draw a curved line along one of your divided quarters. Leave a little bit of room for your flowers. Then, draw on individual leaves. For this wreath, the leaves resemble upside-down teardrops and should be slightly angled towards the top of the bough. Make the leaves evenly spaced, and you can make them get a little smaller as they get closer to the top. Do this for each of the four quadrants.
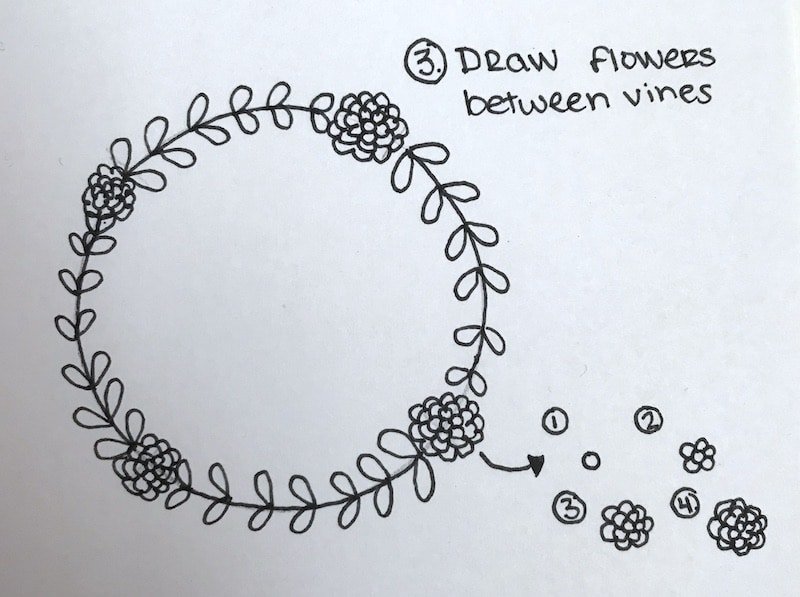
In this step, we will be drawing our flowers between the leafy boughs we just drew. Do make this simple flower, start with a small interior circle. Then, draw little half-moon shaped pedals all the way around it. Continue adding rows of petals until you have filled the space between two boughs. Draw this flower between all the gaps in your boughs.
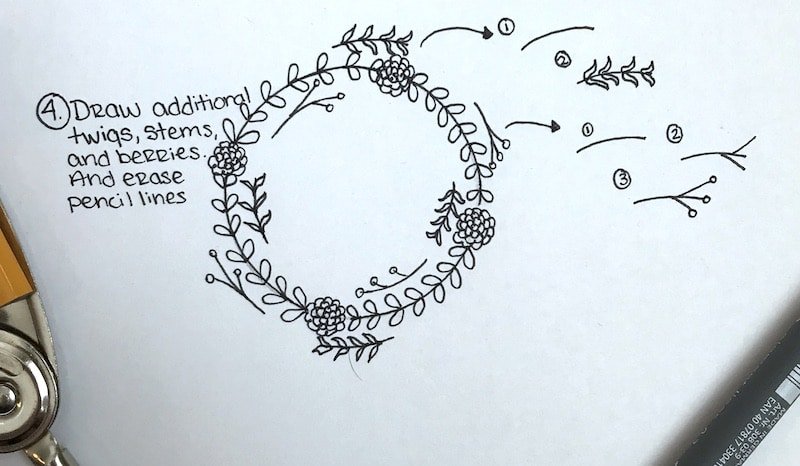
The last step is to add additional twigs, stems, and berries to your wreath. Like the first bough, this bough has a shorter curved line. Then, you will draw curvy leaves that angle up towards the top of the bough. Space these evenly around the wreath, adding some inside and outside. Stay close to the wreath. To draw the branch with berries, draw a single, slightly curved line. Then draw two more lines angling out of each side of the branch. Draw small circles on the ends of the branches to create the final branch. Like previously, space these evenly around the wreath adding them to the inside and outside.
>>Download the Printable Guide Here<<
Now your wreath is complete! For your bullet journal, add monthly or weekly headers inside. Decorate your wedding invitations, save-the-dates, or other cards with this simple floral wreath.
Come Doodle With Me
Want to learn more fun and easy creative elements you can use in your bullet journal or in card making? Enroll in our course, Rock Your Journal. We’ll be showing you how to draw floral line art, hacks for lettering, unique and creative headers, and MORE!

Ashley Ziegler says
This is so helpful!! Thank you 🙂
erinnichols91 says
You’re welcome. I’m glad you enjoyed it.