If you love analog shopping lists and bullet journaling, you have to try this bullet journal pocket shopping list. It’s reusable and always in a convenient place.
This post may contain affiliate links. Please see my Disclosure for more information.
Today’s post is a fun bullet journal tutorial in which I’m going to show you how to create a pocket shopping list.
I don’t know why I haven’t thought of this previously. Keeping a shopping list in my bullet journal is so much more convenient than having one on my fridge or on the back of an envelope.
What’s always turned me away, however, is that shopping lists change once, maybe even twice a week. So a having a shopping list in my bullet journal has always seemed like a waste of journal realty.
But, alas, the perfect solution came to me. Over a cup of coffee, no doubt.
I could fold and adhere a paper pocket onto a page in my bullet journal and then change out the list as needed.
**Lemme just note, ideas come to my mind all the time. Not all of them are worthy of a blog post or even a mention. Some are tossed in the metaphorical trash shortly after they come to mind. But this bullet journal pocket shopping list is a success worth sharing.
I know many people use apps on their phone. I respect it. But I’m a sucker for a handwritten shopping list. Nostalgia and memories of ‘simpler times’, perhaps.
But in all honesty, it’s mainly because I despise carrying my clunky phone while I’m grocery shopping, pushing a cart, and trying to herd two children. A small, weightless piece of paper is much less complicated.
So, with that, let’s get into this tutorial so you can have a snazzy pocket shopping list, too.
Bullet Journal Pocket Shopping List

This page took under 15 minutes to create, minus the doodles. It’s quick and efficient. This is a great bullet journal collection page for moms, people with roommates, those in dorms, etc.
How to Make a Shopping List
The first thing you’ll need to pull together is all of your materials. Then you’ll be ready to get started!
Here’s what you need to make your own shopping list for your journal:
- Extra pages in the back of your journal, or plain printer paper
- Pencil
- Scissors or Razor Knife
- Tombow Mono Permanent Adhesive
- Tombow TwinTone Markers
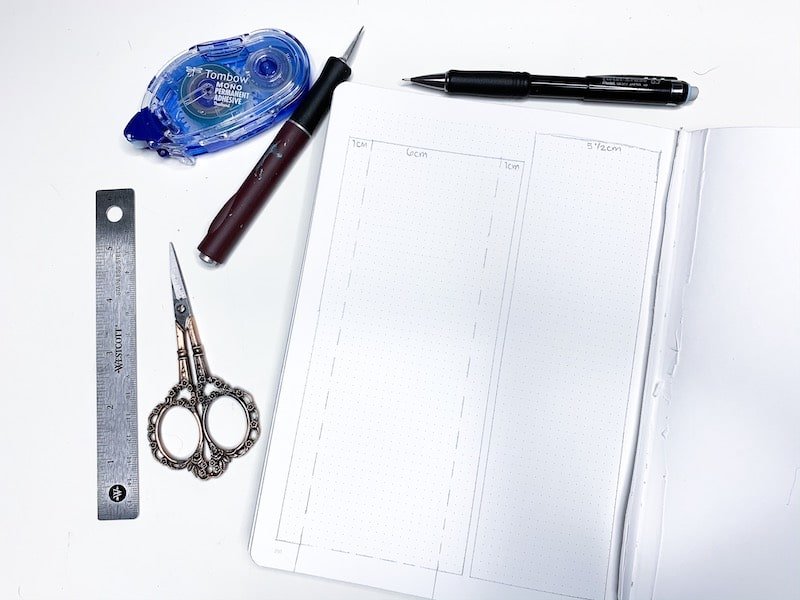
First, you’ll need to decide what type of paper you want to use for this project. I used a pair of scissors to cut out one of the pages at the back of my journal because I wanted the dot grid on the pocket. But, if you prefer not cut your journal (totally understandable) you can use printer paper as well.
Next, you are going to draw your pocket on the paper with pencil. Your pocket will be composed of a large vertical rectangle as well as thinner rectangles along the sides and bottom. These smaller rectangles are what you will fold and secure to your page. I have marked the folds with dashed lines.
For mine, I made the front of my pocket (the large rectangle) 6cm wide and roughly an inch and a half shorter than the page. The smaller rectangles along the sides and bottom measure 1cm in width. This is the perfect width for using the Tombow Mono Permanent Adhesive with.
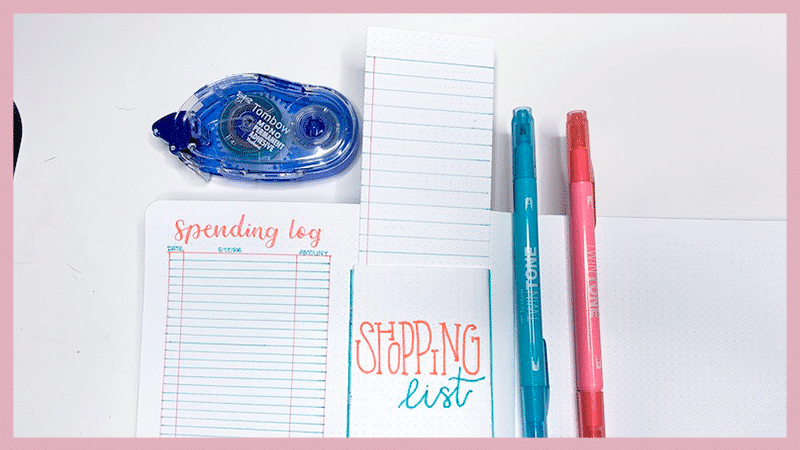
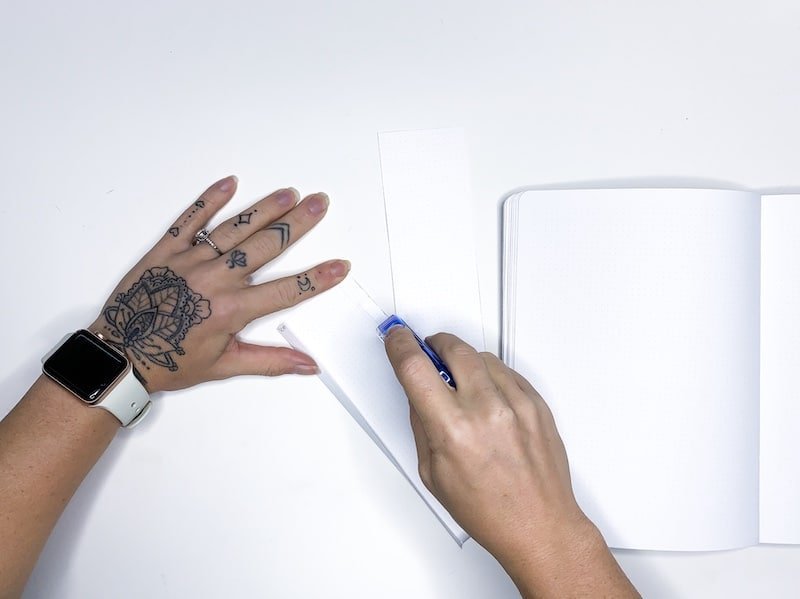
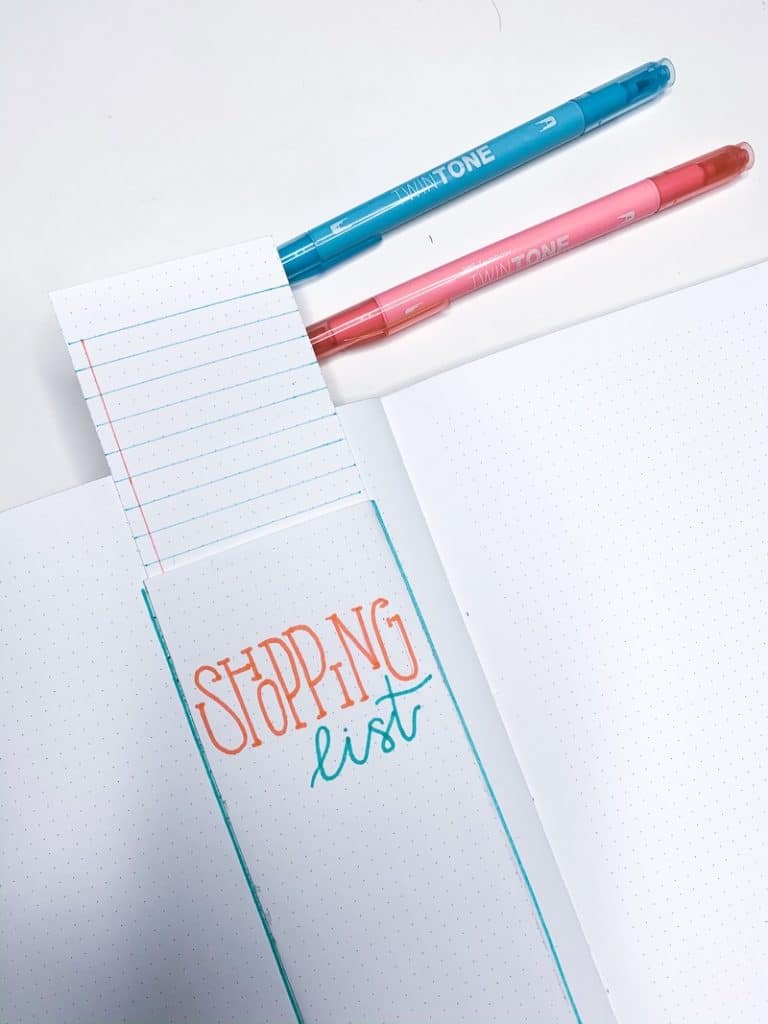
I had space on the same page for my first interchangeable shopping list which I made a half of a centimeter shorter in width than the pocket. This ensures it will fit in nicely and be easy to remove as well. I drew it taller so that the top inch or so would stick out above the pocket for easy removal.
Next, use your scissors to carefully cut out your pocket and shopping list insert. Then, fold your pocket along the dashed lines shown in the image above. It should resemble the pocket below.
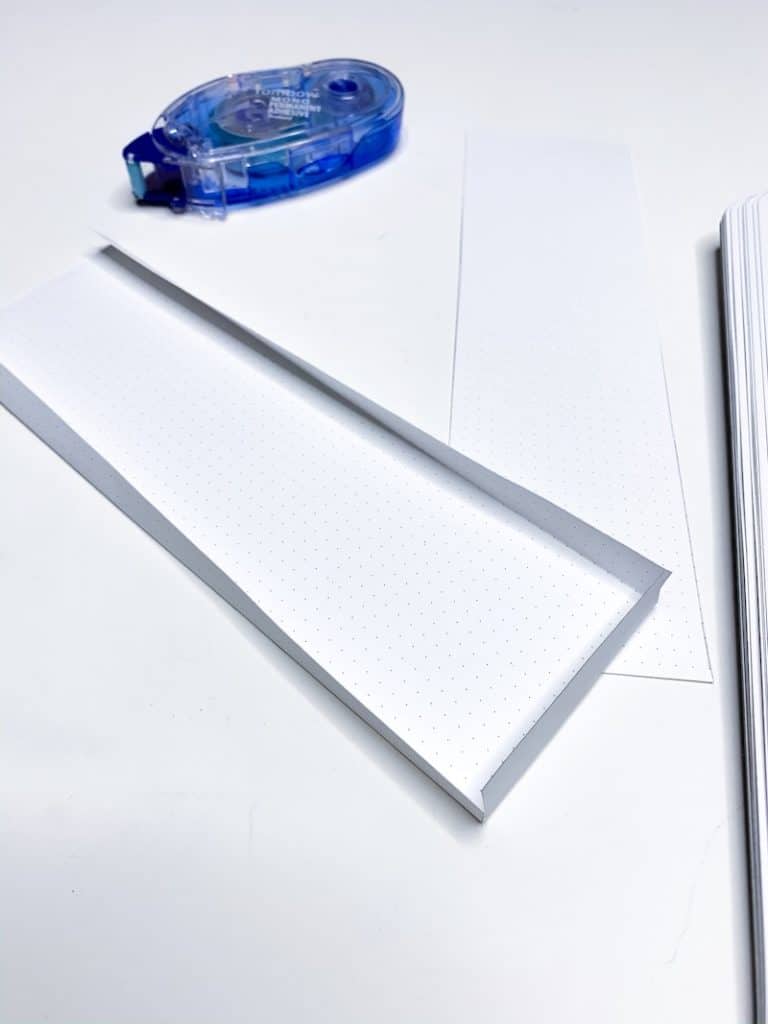
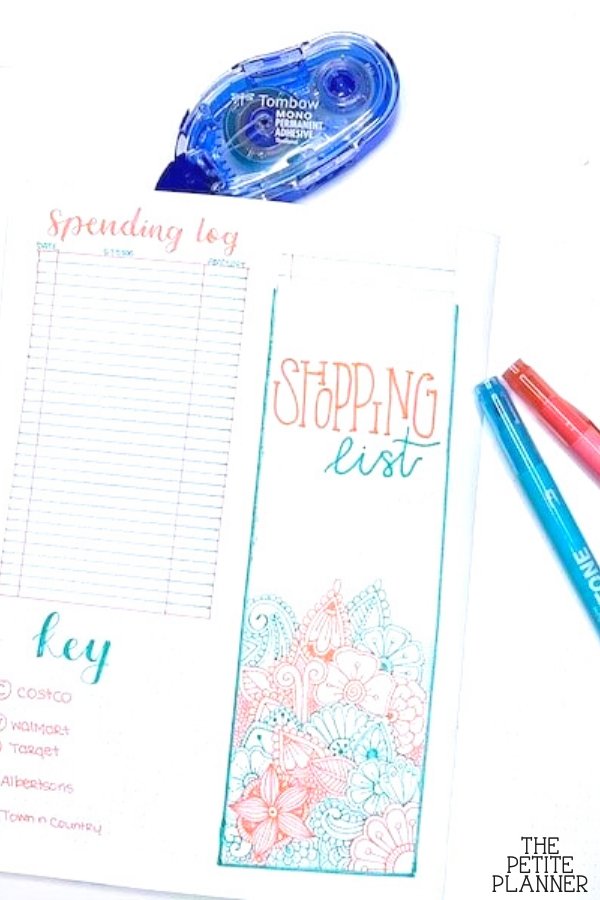
From here, use your Tombow Mono Permanent Adhesive to add strips of tape along the folded edges. Go slow and try not to get any on the underside of the pocket. Then, secure it onto the page where you intend to house your shopping list.
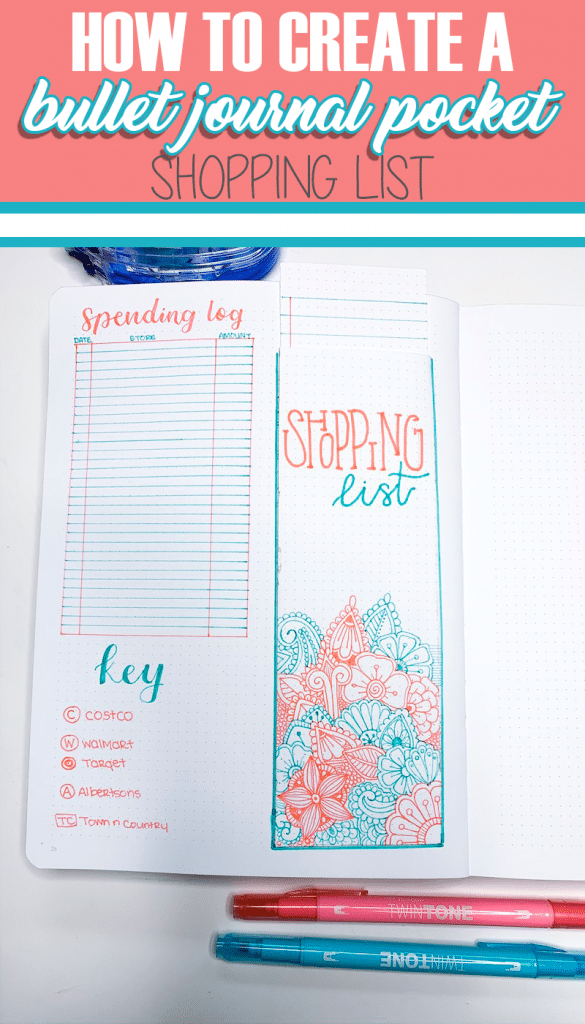
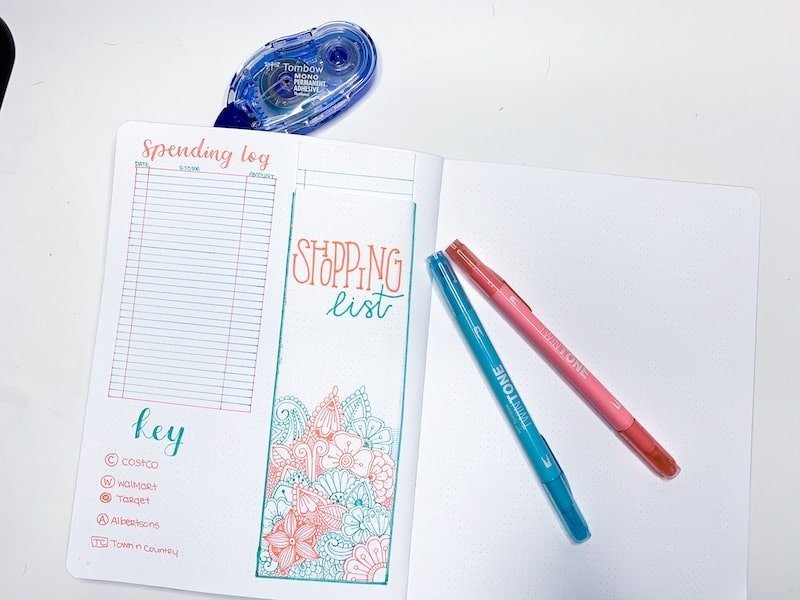
The next step is to add a heading to your page. I chose to write mine directly on the pocket with the Tombow TwinTone Pastel Markers. With the pink marker, I did an uneven serif print font. And with the blue marker, I wrote the word ‘list’ in cursive.
After this, the remainder of the page and design is personal and up to you. I decided to add a grocery spending log along the lefthand side of my pocket to keep track of how much we spend on groceries in a month.
And I also added a key for the grocery stores I regularly shop at. This way I can add little icons next to items on my list that need to be purchased at a specific store.
You could also add some of these things:
- A master shopping list of items you keep on hand regularly.
- A second pocket for coupons.
- Food doodles. Check out these fun and easy doodles.

Bullet Journal Pockets for Other Things
After creating this pocket shopping list in my bullet journal, I was thinking of all the other creative ways to use a pocket.
- Notes
- Tickets
- Receipts
- Coupons
- Private information (passwords, account numbers, etc.)
What other ideas can you think of for using a pocket in your bullet journal? Let me know in the comments below. And if you use this, please share it with me on Instagram.