
Want to add a modern gold & black lunar calendar to your month pages? This easy to follow tutorial will walk you through each step.
 *This post may contain affiliate links. Please see my Disclosure for more information.
I recently shared my July Plan With Me video on YouTube which had a completely different feel than what I’m used to. It’s much more simple and basic than previous months. The response from the community was incredibly supportive. But it also gave me a little insight into what I need to do more of here and on YouTube.
Long ago, when The Petite Planner was created, I wanted to share my own journey but also help others be more confident in their creative skills. So, in an attempt to bring that helpful and all-inclusive environment back, I want to share more tutorials.
PS: I’m currently creating a YouTube Series of simple drawing, lettering, and bullet journal tutorials. The series is called Back to the Basics, and the first video is already live, here.
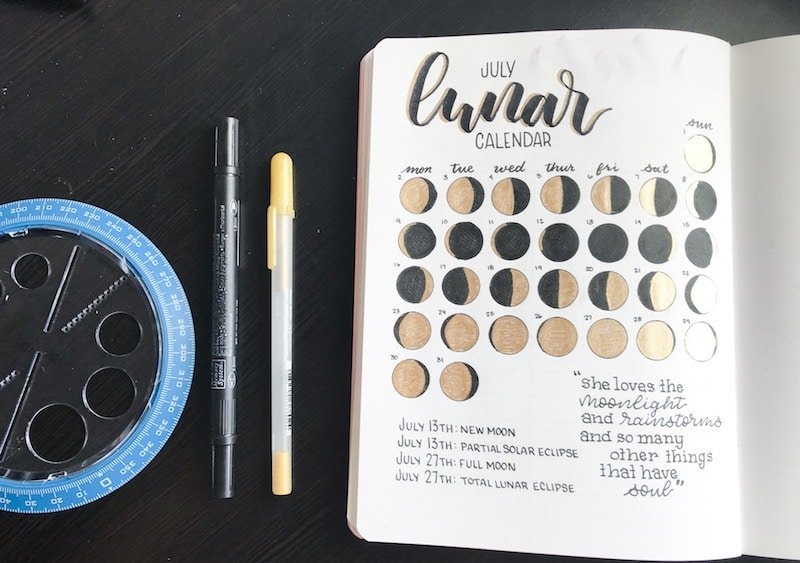
This July 2018 Lunar Calendar is very easy to draw, but it does take a little bit of time. The estimated completion time on this page is about 1 hour with coloring and final lettering. However, it’s a great page to add to your monthly pages if you regularly pay attention to the moon phases.
How to Draw a Lunar Calendar in Your Bullet Journal
Why Add a Lunar Calendar to Your Bullet Journal?
There are a few reasons someone might add a lunar calendar to their bullet journal. The first and likely most widespread reason is aesthetic. People like to make new pages that are pretty to look at. It’s a good way to practice your skills and have some creative fun in your journal.
However, the other big reason that people want a lunar calendar in their bullet journal is that they believe that the moon plays a big part in day-to-day life. Many people believe that different moon phases affect our behavior and mood. Also, astrology says that with large changes in the moon, such as a new moon or full moon, opportunities arise.
For instance, a new moon is considered an optimal time to evaluate and really look at your goals. During the crescent moon is the best time to start working on projects and goals. And the full moon is when everything starts to come together.
For many people, having a handy diagram of the moon phases for the month will help them plan out their activities, work schedule, goals, etc.
Materials & Directions
The directions and materials list below both show how to make the gold and black lunar calendar pictured above. However, if you don’t have a gold gel pen, want to shave some time off this project, or prefer a different look, you can leave the gold areas blank or use a different color.
- Pencil
- Eraser
- Circle Stencil
- Black Pen
- Gold Gel Pen
- Black Marker


These directions were created using a Leuchtturm1917 for spacing and size. Adjust accordingly for a larger or smaller notebook.
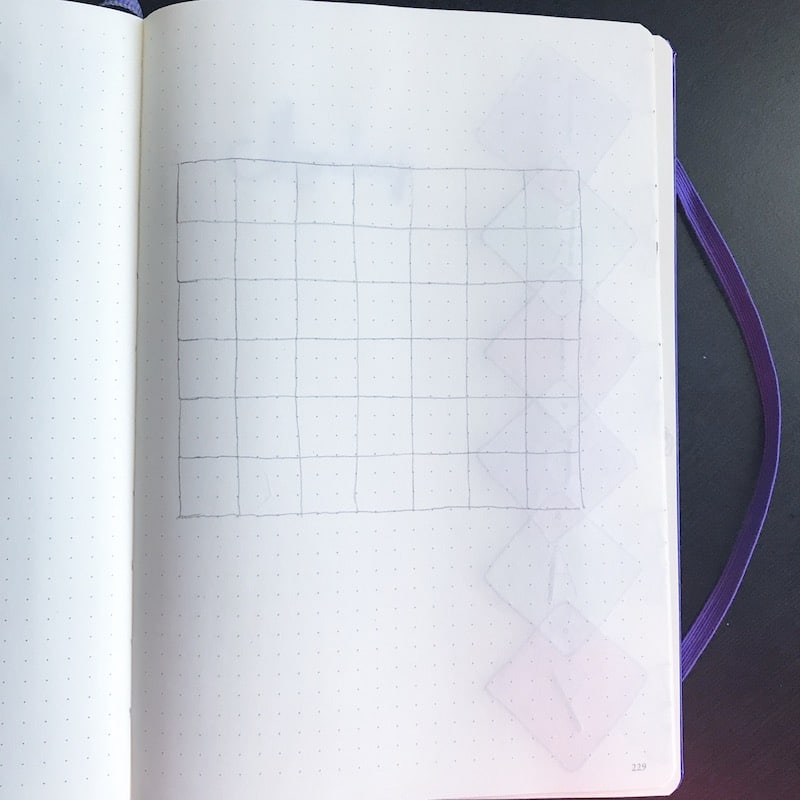
- In pencil, draw out a vertical monthly grid with 7 columns and 5-6 rows depending on how many months are in the month. In the Leuchtturm1917
, each box will be 3×3 units and all boxes will be touching. These lines do not need to be perfectly straight or drawn with a ruler; we will be erasing them later.
- Next, label the dates according to the month. It’s preferable to keep your date small and in the upper lefthand corner of the corresponding box so that you have more room for your moon diagrams.
- Now, for every day of the month, use your circle stencil to draw a circle in black pen. In the 3×3 boxes, a 1/2″ circle stencil will fit best. I use this Helix Angle and Circle Maker
to draw my circles.
- Next, head to Moon Giant and find the corresponding month. This is where you will see and be able to copy the moon phases for each day of the month. Using either a pencil or a black pen, copy the moon phases into your circles, being careful to pay attention to the dates.
- Now you can erase your pencil grid.
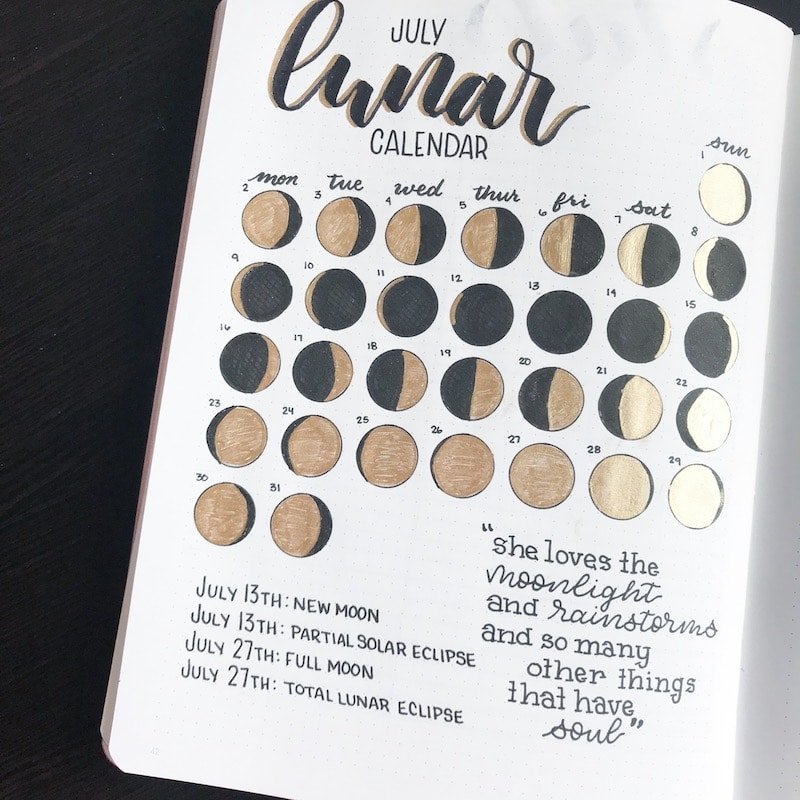
- After your moon phases are drawn in, you can start filling in the moon diagrams. Use your gold gel pen to fill in the sides of the moons that are visible. On Moon Giant, these are the white areas. Then, use your black marker to fill in the dark sides of the moon.
- Lastly, add your header. To do this, I used a Tombow Dual Brush Pen in black and then used the gold gel pen to create a drop shadow on the lefthand side.
Optionally, you can write in any important lunar dates such as the new moon, full moon, and any eclipses occurring that month.
Pictorial Directions
DO NOT copy this exact lunar calendar; I messed it up. The calendar was meant to portray July, but I was looking at the June lunar calendar when I made it. So, all of the diagrams are completely off.
The first few pictures were drawn for tutorial purposes, while the finished lunar calendar is my actual July Lunar Calendar in my bullet journal, and the diagrams on that page are correct.


If you enjoyed this tutorial and recreated a lunar calendar in your bullet journal, I’d love to see it. Tag me on Instagram, @the.petite.planner, or head over to Facebook and share with me there.
And if there is anything you want to see done in a tutorial format in the future, please let me know in the comments.

